10/29/11

Aloe

I know I have been missing in action the last two months.  Thank you everyone who emailed me to make sure my health is ok.  I am feel great and just got lost in the beautiful Indian summer we have been having.  Now that it is cold I will be inside more and can share what is cooking here in the house.

Last week I brought my plants in to save them from the cold and it has been interesting.  10 years ago my mom gave me a start of aloe and now that one little plant has turned into two humungous planters full of happy aloe.  The problem is my daughter can't decide where they go.  She is an Angel with autism and having everything in the right place is very important to her.  I never see her move the planters, but they have been making the rounds through every room in the house.  In all the moving there have been a few casualties and that has gotten me thinking about all the ways to use aloe around the house.

Here are a few of my favorites.
How To Treat A Wound With Aloe
  • Clean wound thoroughly
  • Apply Aloe Vera pulp in the wound
  • Wrap tightly with a bandage
  • Keep bandage soaked in Aloe Vera juice
The wound should quickly heal with little or no scarring, bandages will remove easily. There is also a much reduced risk of infection when using Aloe.
For minor scar removal, keep applying Aloe Vera juice morning and night (daily). This may take several months to see great results (six months or so).
For painful scrapes and abrasions, gently slide a split leaf over the area and reapply several times during the next 24 hours.

Burns & Sunburns
Good for soothing and healing burns and sunburns, simply apply juice from an aloe leaf directly to burned area.
Home Remedy For Digestive Problems
  • Three times daily take 1 to 2 TBS of aloe juice/gel. This will act like a general tonic and mild regulator of the bowels.
Sap Extraction For Bowel Regulation
The sap is a yellow bitter fluid that flows between the skin and the pulp of the Aloe and acts as a laxative.
  • Place green peelings of an aloe leaf in a jar of water and refrigerate. The more leaves in the jar, the stronger the tonic will be.
  • Take a few sips once or twice a week to help regulate your bowels. Top up the jar with fresh aloe leaves as needed.
Scalp & Hair Treatments
Aloe juice can add luster, richness and manageability to hair as well as heal some scalp abrasions and diseases:
  • Before bedtime wet hair thoroughly with aloe vera juice and allow to dry. Rinse thoroughly in the morning (may suds up a bit).
Poison Ivy, Poison Oak & AllergiesUse Aloe Vera as a pain inhibitor and reduce itchiness, also enhances healing of rashes and sores:
  • For relief apply aloe vera juice directly to area that is irritated.
Pregnancy Stretch Marks
  • Apply Aloe Vera juice directly to skin while pregnant, after birth keep applying to encourage healing.
  • As soon as the bite or sting occurs, split open a leaf and apply it directly to the bite area.
Arthritis Treatments
  • Dice up Aloe Vera leaves and place pieces in a jar of water, refrigerate. Drink 4 Tablespoons per day and top up water in the jar as consumed. The drink can be bitter but it does go away over time. Some may find relief right away, many don’t find relief until a couple months later. Make a fresh jar of leaves as needed.
  • For aching joints and muscles, rub Aloe Vera on the skin, relief should be felt within a few minutes and can be repeated as necessary.
Age Skin Spots
  • Apply Aloe Vera juice to the spots twice a day, spots will be reduced or completely removed after several months of treatment. 
Acne Treatments
  • Give your skin a good cleansing morning and night. Apply juice directly from the leaf. Can also apply to pimples and other sores.
  • For removing old acne scars, apply a little Aloe Vera juice morning and night until the scars are gone. This can take several months. If skin is dry, apply with a moisturizing cream.
Asthma
  • Boil Aloe Vera leaves in a pan of water and breathe in the vapor.
How To Tell If You’re Allergic To Aloe Vera
Before applying any first aid treatments, find out if you have an allergy to it first. If you’re allergic to aloe vera, you may experience the results opposite to what you were hoping for. Here’s how you can quickly find out if you’re allergic to aloe vera:
  • Apply a small amount of aloe vera juice on the inside of your arm or behind your ears. If a rash appears or you experience a stinging sensation within a few minutes, do not use aloe vera for first aid.
Did You Know:
  • After removing an aloe leaf to treat a burn or cut, you can refrigerate it and it will keep for 2 to 3 weeks.
  • Aloe Vera is an astringent and may cause skin to dry. You can apply baby oil or other lubricant along with the aloe to help prevent dryness.
  • What leaf is best to use in first aid treatments? The lowest leaves (closest to the ground) should be used first. These leaves are older and larger so they have more juice and greater potency.


Caution For Diabetics:
Drinking Aloe Vera juice might enable the pancreas to produce more of its own insulin. Before taking aloe vera internally, diabetics should have their physician monitor their need for extra insulin since too much is dangerous.

If you don't have one of these wonder plants in your house go and get one!  they are really low maintenance and almost imposable to kill. 

9/17/11

Figs in a blanket!

My sister gave me a package of fresh figs today and I had no idea what to do with them.  Fresh figs are not something that we get that often.   I found this cute "recipe" that I think all my primal friends are going to love.  It is sweet, it is savory... it is quick and easy!  What more could you ask for?


Wrap each fig with a piece of bacon (I  used a slice of bacon halved lengthwise and wrapped it around the fig in a spiral).

Place figs on a baking sheets and broil, turning as needed, until bacon is crisped and browned. Serve hot.

Heating Pillow

Autumn is here!  It is my favorite time of year.  As the leaves change color and the storms roll in I end up feeling cold and achy at night.  My body seems to think I am not a cold weather person.  I know you are thinking that it never gets ((THAT)) cold where I live.  It is true!  The good news is the heating pillows help me be less of a baby.

These pillows are terrific for:
Hand warmers for anyone who wears gloves in the cold (hunters, skiers, hikers, or as you get into your car in the morning)
Neck wraps to ease sore muscles caused by hunching over the sewing machine.
Easing the pain of fibromyalgia and arthritis.
For sore overworked muscles.
Easing PMS cramps.
Helping breastfeeding moms lower their milk and comfort sore breasts
Cold feet in bed
Keeping food warm on the table or while being transported. Just put the dish on top of the heating bag.

These bags can also be frozen, and used as a ice pack for cold therapy.

No pattern is necessary, simply cut two pieces of cloth in the size/shape you wish your bag to be. Make sure to leave a seam allowance for yourself (about 1/2″).
Some prefer regular square shape bags, others prefer tubes or more rectangular shapes. Experiment, whip up a few different sizes and shapes to try. These are really easy to make as well as cheap!


You can use almost anything to fill your heating pillow.  Some of the options are: 
Uncooked rice
Wheat
Feed corn
Buckwheat hulls
Barley
Oatmeal
Beans
Flax seeds
Cherry pits
You can also add the following to the above for a soothing fragrant heating pad: Spices, herbs, essential oils. 
Ideas: lavender, rose petals, ground cloves, nutmeg, ginger, rosemary, cinnamon, peppermint oil, crushed mint 
If using: Mix herbs, spices and essential oil with choice heating pad filler (such as rice) and let sit in a sealed container for a few days (occasionally stirring). This will help set and distribute the fragrance a bit.

Cut and sew the fabric for the heating pads the size and shape you want.


Leave an inch or two open on one side so that you can fill bag with your choice of filler. Fill the bag about 1/2 to 3/4 full, more or less as you prefer. Don’t fill too full though, you want the bag to mold itself around your body when you apply it.


 Once bag is filled, sew opening closed either by hand or machine (making sure filler is contained at the opposite side of bag).
If wanting a removable cover, just sew a “pillowcase” idea with your soft, plushy fabric by making it a little larger than your heating pad and leaving an open end (make sure to finish off ends by sewing a hem). Or you can add a strip of velcro to close it. Make sure to never microwave this cover unless it’s content is full cotton. Remove cover to wash as needed.


Directions:
Place in microwave and heat for 1 to 3 minutes, depending on size of bag. Do not leave unattended “just in case” the filler smokes or starts on fire! As a precaution, you can set a cup of water inside the microwave while heating the bag to add moisture or spritzing bag lightly with water before heating. If you add spices and herbs, this is a good idea to do. 

That is all there is to it.

9/8/11

"not spaghetti" and Venison meatballs

It is fall and around here that means it is the start of hunting season.  It is the time of year for some Wild recipes.  Who is up for an adventure? 

I know what you are thinking....  "Isn't venison really Bambi?".  Why yes, it is.

Keep in mind that Venison is a healthy and delicious meat choice, but the road to a tasty meal requires care in the processing and preparation. If you’ve had gamy tasting venison before, chances are the offensive taste was obtained through processing or cooking. The meat’s quality is a result of the deer’s age, sex and diet. Older deer have tougher meat, while the meat of bucks in rut is stronger tasting from the stress of breeding season.
For nutritional value, venison is low in fat and calories and rich in protein. Use low-fat cooking techniques, such as broiling, grilling, baking or stewing instead of frying to keep the venison healthy.
Nutrient content of domestic and wild game meats (cooked, 3-ounce serving, unless otherwise indicated)
Domestic Calories Protein Iron Total
Fat
Saturated
Fat
Cholesterol
Beef 184 25 3 8 3 73
Pork 180 25 1 8 3 73
Chicken
(roasted, skin off)
161 25 1 8 2 76
Wild Meats
Deer 134 26 4 3 1 95
Turkey 121 26 _ 1 _ 55  


All in all, just keep in mind the deer you are cooking and match it with the right cooking technique—roasting and stewing for tougher cuts and frying, broiling and grilling for more tender cuts.

 Sauce
It is just fine to grab your favorite bottle off the shelf and save your self some time.  We have an abundance a tomatoes this time of year and I like a more chunky style sauce so I made it my self.

10-15 tomatoes, skins removed and chopped.
2 cups chopped fresh onions, sauté them until they are soft.
3  clove of garlic, minced
2 Tablespoons diced, fresh OR dried basil
3 Tablespoons of oregano
2 bay leaves
2 Tablespoons chopped red sweet peppers
and a squeeze of lemon if you like it more acid.  Note: For thicker sauce add a can of tomato paste.

 While the sauce is cooking, make the meat balls.


Meatballs
1/4 cup grated Parmesan
1/2 cup finely grated carrot
1/2 cup finely chopped onion
2 large cloves garlic, minced
1 tablespoon dried parsley
1 teaspoon dried thyme leaves
1 egg, lightly beaten
1/2 teaspoon salt
Freshly ground black pepper
1 pound ground venison (or turkey meat)

Combine all ingredients except the meat into a large work bowl.  Once the ingredients are well-mixed, add meat.  Using your hands, combine ingredients.  Form meatballs into 2-1/2 inch balls.  Warm a tablespoon of oil in a skillet over medium-high heat. add meatballs and brown for 2 minutes.  Turn and brown the other side for 2 minutes.  Turn down the heat to medium and put a lid on the pan.  Cook for 10 to 12 minutes, until meatballs are no longer pink inside.


"not noodles"
summer squash or zucchini
2 cloves garlic, finely chopped
olive oil

Peel your squash and cut into little noodle like strips.  Place them on a paper towel to dry.  You can even do this part hours before. If you don't let them dry they will be mushy when you cook them.

When you are ready to cook them warm up the oil and garlic in a pan. Saute the noodles for just a few minutes to heat and cover with oil.  That all there is to it!


Put it all together and you have a beautiful dish that will please even the pickiest gluten free eater.

9/3/11

How to make Vinegar

A bottle of vinegar can be found in nearly every household.  It is setting on the shelf just ready for use on salads and as a taste enhancement in any number of recipes and for pickling and preserving foods.

Vinegar is the first thing we reach for when we need to clean off the spots on the windows and the mirrors.  If your dish washer needs and overhaul you just run vinegar through it.

Plant-wise Women have always used it topically in potions to retain and  enhance the beauty of their hair and skin.

In the early nineteen hundreds the medicinal/nutritional properties of vinegar fell out of favor along with medicinal herbs.  If you care to look, the health benefits are just astounding.
Vinegar is rich in mineral salts and potassium, which play an important role in metabolism,respiration, blood conditioning, and nervous system vitalization.
Vinegar is warming and helps with circulation so it helps with stagnant blood and can also move a stagnant mood.  It quickly reduces accumulations in the liver resulting from a bad diet.
***Vinegar neutralizes poisons in the body and it great for food poisoning.  Take 1/4 teaspoon every 15 minutes until relieved. 
It relieves damp conditions such as edema,overweight, excess mucus, and athletes foot.  (soak feet in vinegar to cure athletes foot)
Vinegar removes parasites and most worms that can live in the digestive tract.
Apply topically to get relief from the toxic effect of insect bites.
Dosage:  except where specified differently above, sip 1/3 cup water mixed with 1 teaspoon of apple cider vinegar 3 times a day.

*Not for those with loose stools, muscular injury or weakness, and rheumatism.

Here is the bad news.  Distilled vinegar, like the FDA has approved, should Never be taken into your body or used topically because it is highly demineralizing.  (it is ok for the dish washer though)

You can buy alive vinegar at the health food store.  For the more adventurous, vinegar is super easy to make.


This aromatic sour liquid is made from a very simple two-step fermentation.

The first step of fermentation is accomplished when appropriate microorganisms turn sugar into alcohol.  These base liquids can simply be sugar and water or fruit juices.  Most vinegar is made from apples or grapes.  Apples being the base for cider vinegar and grapes being the base for wine vinegar.

The second step is accomplished by the action of the microscopic entity, Mycoderma aceti, which takes over and turns the alcohol into a dilute acetic acid.  Mycoderma A. is resident in all  free flowing air, and in time will find any alcoholic liquid left exposed.

Theoretically, you should be able to open a bottle of sweet cider and let it stand and after 5 weeks it will turn into a hard cider, then to vinegar. This process can be enhanced and quickened by adding a little "mother" from a previously made batch.

The mother is a naturally occurring, thick, jellylike substance that congeals at the bottom of the bottle.  It can be filtered out and passed from batch to batch as an inoculate which helps to insure that you continue to manufacture high quality vinegar.


Here is a better look at the mother.  You can purchase a mother at the health food store or you can just do like I did and strain it out of bottle that that I had almost used up.

8/27/11

Seafood Gumbo

I just made gumbo for the first time ever!  I have to say it is really great and I will do it again.  Even Jim liked it and he is not really a seafood person.

 Thanks to Barbara for the recipe!


Ingredients:
3 T. olive oil
2 C. onion, chopped
1 C. celery, chopped
2 large tomatoes, chopped
8 C. organic chicken stock
8 C. water
4 cloves garlic, minced
Tamari, black pepper, and red pepper to taste
1/2- 1 pound fish (any kind), in chunks
2 pounds shrimp, peeled and deveined
1 cup frozen clams
1 T. parsley, finely chopped
1/2 t. "gumbo file" (dried sassafras leaves)

Moisten bottom of a large pot with 2 T. water, then add oil and heat with medium heat until hot.  Add onions and celery.  Cook until onions are wilted and then add tomatoes, chicken stock, water and garlic.  Cook over medium heat for 30 minutes and season to taste with tamari, black, and red pepper.  Add fish, shrimp, clams and parsley.  Cook another 10 minutes.  Garnish with a sprinkle of gumbo file.

This is super easy!

8/26/11

take a hike

Jim and I just celebrated out tenth wedding anniversary!  It is a big deal to me.  Some how getting in to the double digits seems like we accomplished something.

We decided that the bast way to celebrate was to revisit the place where we got engaged and where we were married.  Come along on our hike!


This is the meadow where we go married.   (yep, same as the picture in my header and yes you read the elevation right)


If you look down from the mountain you see medicine lake.  It is more like a glorified puddle, but we love it.


Look at this!  There is still snow up there!


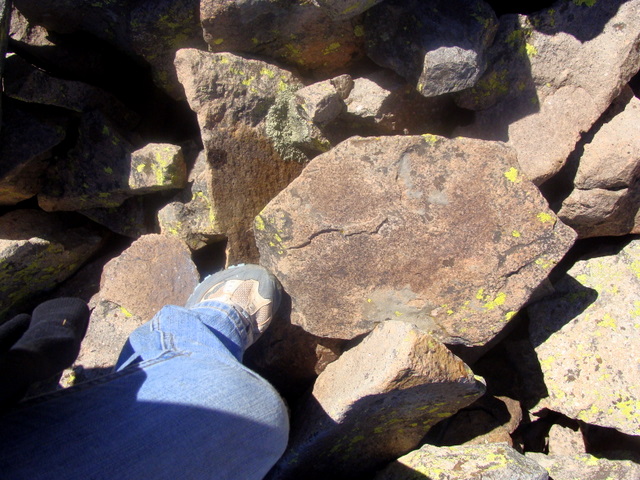
The hike gets really scrambly at the end.  All the rocks are loose and they slip down the mountain as soon as you take your foot off of them.  Every so often there is a bit of life that is clinging on even in such a harsh place.  This columbine  just made me smile.


We had to take a break.....  Jim made sure that I documented how tired we were.


He really is up there.  Jim made it... I chickened out when the rocks he stepped on started to hit me.


It was fine because the view and the silence were amazing.


It is hard to see in but there is a very dead tree and a very dead cow in this picture....  I thought they were both kind of cool.


This little guy was super cute and not afraid of me at all.


Thanks for coming with us!

8/24/11

Fruit flies-Trap & Zap em

I LOVE this time of year! The weather cools off a little and it seems that I have a lot more ambition for everything.   I love how fruitful and abundant my life feels.  I love that the dehydrators are going full steam and that the freezer is full of peaches and plums.  I love the bottled produce all lined up neatly in a row on the shelves.  I love that every one who comes to see me leaves with a bag of goodies from the garden.

But I HATE....

fruit flies!

One day you have no fruit flies and then the next you have hundreds.... and the next day they are a million strong.  Are you kidding me?   After much googling and experimenting here are the things that actually work and you most likely have everything you need already!

First do your best to prevent them in the first place.

Fruit flies love sweets, ripe vegetables and fresh fruit, especially if it’s overripe (the fermenting process is a strong attraction for them). If they’re in your house, they’ve found a food source to feed from and lay their eggs on. To effectively get rid of fruit flies, you need to find their food source and remove it immediately.


Wash kitchen counters and surfaces daily with soap and water. Wipe up sauces and spills immediately, look under heavy appliances.

Make sure to keep kitchen sinks and drains washed and clean, if dirty the residue can attract fruit flies. If you think your kitchen sink drain is where they’re gathering, pour boiling water down the drain each day.

Make sure all food dishes are washed and put away (do not leave dirty dishes out). If food is eaten throughout the house rather than just at the kitchen table, look for dirty plates, fruit pits, rinds and peels that may be left out in another room. Look under furniture.

Don’t leave beverage bottles, cans and glasses filled with fruit juices, soda pop, or spots drinks sitting out–these are big attractions to fruit flies.

On hot summer days, tie up and remove garbage from the kitchen daily, the refuse and kitchen scraps start turning faster in the heat and the smell attracts the fruit flies. Or make sure the garbage bin has a tight fitting lid to keep out the flies.

Make sure to rinse out all cans and bottles before placing in the recycling bins.

Keep food and fruit wrapped in plastic or in the refrigerator (especially overripe fruit, this is like a magnet to the little pests). Fruit flies love to lay their eggs on food.

Watch the pantry, bags of potatoes and onions are quicker to turn in the heat and this will attract the little flies. Keep pantry shelves clean of all drips and spills.


Next you could try to trap them.  Fruit flies are one of the easiest little pests to bait and kill, no elaborate trap setups required. Here are a handful of homemade traps you can try, all of them are free from harsh chemicals

Cider Vinegar Trap Recipe
1 cup water
1 cup cider vinegar
2 tsp dish washing liquid

Directions: Pour into a jar or bottle and set out close to fruit & produce. The smell will attract the fruit flies and they will come investigate, getting themselves covered with soap and then drown.

Fresh Fruit Bait
Place a piece of cut fruit in a jar (use a ripe/overripe banana if you can, this seems to be their favorite). Roll a piece of paper into a funnel (cutting the bottom tip so there’s an entry) and place into the top of the jar to trap fruit flies. Make sure the bottom opening of the funnel doesn’t touch the fruit (you don’t want the fruit flies to have an easy exit) and that the sides of the funnel fill the jar opening completely (no cracks for the flies to get out). Make sure to remove and replace the fruit every two days to avoid breeding new fruit flies. You could also skip the funnel and just cover the jar with plastic wrap, poking a few small holes in the top for them to enter.

Coca-Cola Trap
Leave an inch or two of Classic Coke in the bottom of a pop bottle and twist on the cap. Take a hammer and nail or drill to make a small hole in the cap (about 1/4″ diameter). Set the bottle in the room where the fruit flies are heaviest. Fruit flies will crawl in and won’t be able to get back out.

Yeast Trap
In a mason jar, sprinkle active dry yeast over 1/3 cup warm water. Add 1 teaspoon of sugar and stir.
Once the yeast is activated and starts to foam, cover the jar top tightly with plastic wrap (try to keep the surface wrinkle free), secure with a rubber band.
Make a small hole in the top for the fruit flies to find their way in, most will be unable to get out.


Or you can Zap them!  This is by far my favorite way and the most fun.  I also think it works the best.   I am really into using what you already have on hand.  Since I am a hair stylist the tools I have an abundance of are blow dryers.

This is too easy.  All you do is get your dryer and turn it on high and hot.  Then turn it around backwards and point the air intake at your fruit flies.  You will have to get pretty close to them, but that isn't a problem because they aren't fast moving.  They get sucked up into the dryer and cremated on the heating element.  Game over!

*note to all my clients:  I am using my old dryer. (not the ones in the salon)

Once it seems you’ve gotten rid of the fruit flies, you may notice a fresh batch flying around–these are likely those that have hatched from the eggs of the previous fruit flies (the gestation period is about 7 to 10 days). Repeat the cleaning process and lay out the traps or zap until there’s no recurrence. This is why it’s important to find all their food sources, fruit flies lay eggs on the food that will hatch later.  This is also a REALLY good reason to wash your fruit before you eat it.


8/22/11

Homemade Vanilla Extract

It seems like there is always some kind of experiment going on in the kitchen here.  My husband is an amazing cook and my daughter is following closely in his foot steps.  I just like to tinker and try new things.  Sometimes they turn out and some times they don't.

One thing I am really happy about is the vanilla extract!  It is super easy and tastes better than what you get in the store.

Did you know that the vanilla bean is not really a bean at all?  It is a seed pod that comes from and orchid.

Today vanilla is still hand pollinated using a technique developed in 1841 by Edmond Albius, a 12 year old slave who lived on the island of Reunion.
Vanilla is so incredibly expensive because of the enormous amount of time and care that goes into every bean pod.
Each orchid flower produces one vanilla bean pod after it’s been hand pollinated. The orchid flowers only bloom for one day so the timing is everything!
Once a flower has been pollinated the bean pod will take around 10 months to mature. It has to be harvested at the right time to ensure the highest quality. After the vanilla bean pod is harvested it goes through an extensive curing process.

Not many herbalists use vanilla medicinally today, probably due to the high cost of the beans. Historically, vanilla has been used as an aphrodisiac, for stomach pain, coughs, as both a stimulating and relaxing nerving, and even for venomous bites.

Using a good quality vanilla can really make a difference in your baking and it's so easy to make your own there's no reason why you can't have the best on hand at all times.

Homemade extract will keep indefinitely too! All you need is some plain vodka, vanilla beans and a few clean bottles.

The following directions will make six 4-ounce bottles.

You need:
Six 4-ounce Amber Boston Round Glass Bottles
12 Whole Madagascar Vanilla Beans
3 cups unflavored vodka.

Thoroughly wash the bottles and caps in hot, soapy water or toss in the dishwasher and allow to air dry. 

Slit each vanilla bean lengthwise with a sharp knife, stopping 1/4-inch from each end.

Cut each bean in half crosswise, giving you 24 pieces.

Place 4 pieces of vanilla (2 beans) in each bottle.

Using a funnel, pour 1/2 cup of vodka into each bottle and push the beans down to submerge.

Screw the caps on tightly and place the bottles in a cool, dark place to steep. The vanilla will be ready for initial use in 6 weeks, but 8 weeks is optimal for the most flavor.


See how pretty the process is!

When you give this as a gift make sure to tell your friends that they can just keep topping off the bottle with a little vodka or rum and it will keep going and going.

Next time I do this I am just going to get the vodka and put the vanilla beans right in it.  It isn't as pretty for gifting but perfect for home use.

Try this! It is so easy and fun.

8/16/11

Ham

Since I have started following the Primal Blueprint it has been one adventure after another in cooking.  This year I have learned how to use the BBQ, I have learned how to use the broiler, and also I learned that the crock pot is the best invention ever.

Part of healing my body from my spider bite and now from fibroids involves using the best (chemical fee) ingredients I can.  I feel so lucky that we have a garden and my parents are really generous to us and keep us stocked up an beef.

Just a short walk from my house is this little shop.


Isn't it cute?  As it turns out ...  there isn't a "Geezer" at all.  It is really two sweet ladies that work there.  They have natural and organic meats.  Some of them are a bit more exotic than you can find at the super market.  like bison burger and steak, venison, and elk.   I saw that there was a pack of Ostrich jerky... no I didn't dare try it.

I settled instead on a nice big organic ham.  I know those little oval shaped hams you can buy are not really meat they are more like glorified lunch meat. That's not what I wanted.   I have cooked a spiral ham before and it turned out good but I wanted to splurge on something better. 

This ham I got from the Geezer was not spiral cut but the girls told me how to cut a ham and sent me on my way.

The basic cooking instructions were the exact same.  Heat the oven, put the ham in a roaster and pop it in the oven for a few hours.  The first thing I noticed was that it had two bones in it not one like the spiral ham did.  (they must remove it?)


I didn't want any glaze on it and I think it looks pretty.

 The next thing I found that way different is the fat.  They must remove the outside fat from the more processed hams because under the skin of this one was at least a half inch of fat.  I was a bit worried when I saw that, but it came right of when I cut the ham.  I just tossed it but I am sure there is some use for it.  I do think it helped keep the ham nice and moist.

I'm learning lots of new things this year and it is kind of fun!


8/13/11

Easy fruit salad


This is more about the picture because it is way too easy to call a recipe.  Isn't it pretty?

So just take what ever fruit is in season.  Wash is really well and slice it if needed.  Put it in a pretty bowl.  I like to save out a cup or so and run the immersion blender over it. Drizzle that over the top as a quick garnish.

I Used mango, blue berry, and black berries.  You are only limited by your own imagination.  If you feel like fruit and you are watching your sugar peel, seed, and slice a cucumber and add to the mix.   Sometimes a drizzle of coconut milk is nice too.

8/12/11

deer

The deer seem to be moving in and they are not afraid of me at all.


This little buck got so close to the house that I could have reached out the window and touched him.


These two were walking right down the sidewalk.


and... this one decided that he lives in between the metal shop and the wood shop.

So far they are leaving my flowers and garden alone. 


from my animal book:
Deer has entered your life to help you walk the path of love with full consciousness and awareness, to know that love sometimes requires caring and protection, not only in how we love others, but also in how we love ourselves.

A deer's senses are very acute and they see extremely well in low light, giving them the ability to understand the deeper symbolic meanings of things. They can hear a twig snap a very long way off. People with this power animal are often described as being swift and alert. They are intuitive, often seeming to possess well developed, even extrasensory perceptions. Sometimes their thoughts seem to race ahead, and they appear not to be listening, to be somewhere else. Anyone with power animal has latent clairvoyant and clairaudient abilities. They can see between the shadows, detect subtle movements and hear that which is not being uttered. Ask the deer to help you develop these true gifts.

The set of antlers grown by the male deer are antennae that connect it to higher energies. If you come across a deer in the wild, try to count the number of points on their antlers. This number is associated with numerology and can carry great significance for those with this power animal.

Deer teaches us to be gentle, to touch the hearts and minds of wounded beings who are in our lives. Don't push people to change, rather gently nudge them in right direction, with the love that comes from deer. Love and accept people as they are. The balance of true power lays in love and compassion.

When a Deer totem enters your world, a new innocence and freshness in about to be awakened. New adventures are just around the corner and there will be an opportunity to express the gentle love that will open new doors for you.

8/8/11

Quinoa Tabbouleh


It is that time of year again.  It is hot hot hot and the garden is beautiful.  I keep tabbouleh in the fridge all the time as a quick and cool meal.  Using quinoa instead  of couscous really ups the protein in this dish and I think it tastes better.

ingredients:
1 C. water
2 C. quinoa

3 small tomatoes, chopped
1 small cucumber, seeded and chopped
2 cloves garlic, minced
2 stalks green onion, chopped
1/2 C. cilantro, chopped
1/3 C. olive oil
juice from one large lemon
salt and pepper to taste.

In a sauce pan stir together the quinoa and water.  bring to a boil, cover and reduce heat to medium low.  Simmer for 15 minutes or until cooked.  Fluff with a fork and set aside to cool.  In a large bowl, combine all the ingredients and mix well.  Place in the refrigerator to cool.  Serve this chilled.

This is so easy and fresh tasting!  I love using it as a filling for the lettuce wraps.

8/1/11

Eggs on the BBQ

My husband thinks anything can be grilled....  even eggs!  This time of year I am grateful to have all the heat outside of the house so I am game to try any new ideas.

Eggs don't like me that much but, I don't mind making these for my family.  Look how cute these are!  Jim says with a little salsa these are smoky and delicious.


Ingredients

1 large bell pepper, the bigger the better
2 eggs
Hot sauce or salsa
salt and black pepper to taste

You’ll need the bell pepper to sit stably on the grill, or else the raw egg will spill out and make a tragic mess. Place the pepper flat on your cutting board and slice in half parallel to the board. Scrape out the seeds and placenta (yup, that’s really what it’s called), being careful not to pierce the outer wall.

Crack an egg into each half of the pepper. Try to distribute the egg into the whole cavity.
Place the filled pepper over the hottest part of the grill. It tastes best with the pepper’s skin charred. Close the grill. If you’re going to eat it with a knife and fork, cooking it to over-easy is fine. But if you’re going to serve it as finger food, cook it a bit longer, so you don’t have a runny yolk. It’s great on its own, but better still with hot sauce, salt and a little black pepper on top.

7/31/11

Grasshoppers! If you can't Beat em Eat em!

In case you haven't heard.....  there is a plague sweeping castle valley.  The grasshoppers are at record numbers and aren't expected to peak for a month. 

Thank goodness we have been spared.  every day I have clients coming in and telling horror stories of how they have eaten EVERYTHING in their path.  Nothing is safe not even the cactus and pine trees.

My friend Jean told me of a spray that she is whipping up that seems to do a good job at killing them.  the only caveat is that you actually have to get it on the hopper.

Hopper spray

3 fingers chewing tobacco
1 gallon water
1 C. Listerine
1 C. dawn dish soap.

She says to boil the water and then put the tobacco in the water.  Take it off the heat and let cool to room temperature.   Strain out the tobacco  and then mix in the Listerine and dish soap.  Put in a weed sprayer and go after them!  Jean says the smell is fresh and lovely.  She swears that this concoction saved her annual horseshoe tournament.  The added bonus is that after the first die off her sprinklers came on and it killed off another wave of hoppers.

Now Sue on the other hand took a different approach.  She said that since they eat everything in her garden.... she was going to EAT THEM.  I have to admire her spirit.

There are a few ways to prepare Hoppers, but they almost always start with freezing them, removing the legs and wings, and then cleaning them.

After that you can place them on a cookie sheet and toast them in the oven.

Garlic Butter Fried Grasshoppers
1/4 cup butter
 6 cloves garlic, crushed
 1 cup cleaned insects*
Melt butter in fry pan. Reduce heat. Saute garlic in butter for 5 minutes. Add insects. Continue sauteing for 10 - 15
minutes, stirring occasionally. 


Grasshopper Gumbo
    Ingredients (6 servings):
    1/2 cup lemon juice
    1 tablespoon olive oil
    1 teaspoon honey
    1/2 teaspoon freshly grated ginger 1 tablespoon Dijon mustard
    2 tablespoon minced fresh herbs -- parsley, mint, thyme and/or tarragon.
    12 frozen grasshoppers, katydids, locusts, or other suitably sized Orthoptera, thawed
    1 red pepper, cut into 1 1/2-inch chunks
    1 small yellow onion, cut into 8 wedges
Directions: Mix all ingredients for the marinade in a nonreactive baking dish. Add the Orthoptera, cover, and marinate overnight. When ready to cook, remove the insects from the marinade. Pat them dry, for ease of handling. Assemble each kabob, alternately skewering the insects, tomatoes, and onion wedges to create a visually interesting lineup. Cook the kabobs two or three inches above the fire, turning them every two or three minutes and basting them with additional olive oil as required. The exact cooking time will vary, depending on the kind of grill and types of insects used; however, the kabobs should cook for no longer than 8 or 9 minutes.


Chocolate Covered Grasshoppers
 2 Squares of semisweet chocolate
25 dry-roasted crickets and/or grasshoppers with legs and wings removed.
 Melt chocolate as directed on the box. Dip insects in chocolate place on wax paper and refrigerate.


Fruitcake, Desert
1 cup Cricket or Grasshopper Flour
1/4 cup Cherries, Dried, Chopped
1/4 cup Cranberries, Dried, Chopped
1/4 cup Water
This recipe is very traditional amerindian and does not take into account advances in cooking technology -such as yeast. It
is, however, a wonderful nutrition bar packed  with protein, carbohydrates, sugars, and about 2% fat (better than most
granola). Mix all ingredients together to make a coarse dough. Pull off enough dough to make finger-sized strips and lay
these on a lightly oiled cookie sheet. Bake at 350oF for 20 min or until the outside is deep tan (adjusting for the colour of
the flour) and a toothpick stuck into one comes out clean. Cool and serve as nutrition bars for snacks, hiking, or camping or
store for later use.Var. - Add 1/4 c Rolled Oats and a tad more Water to make this more like a granola bar.
Substitute other Bug Flours for slightly differing taste.


If any one out there is  brave enough to try this please let me know.  I would love to hear about it.